Many Windows users want to ensure that new apps and games are safe before installation. Websites like VirusTotal are handy for this, but what if you don’t have internet access? This is where virtual machines can help.
What Are Virtual Machines?
Virtual machines, such as VirtualBox, allow you to run apps, games, or even entire operating systems in an isolated environment. Essentially, they let you operate one OS within another. For instance, you can run Linux on Windows 11 using VirtualBox.
However, a downside of using VMs is that they can create hidden processes that increase CPU usage. You may notice the Vmmem.exe process in Task Manager, which can consume significant RAM and disk resources.
Understanding the Vmmem Process
If you spot the Vmmem process in Task Manager, there’s no need to worry! While it can use a lot of your system’s resources and potentially slow things down, it’s generally safe. The presence of Vmmem indicates that virtualization is active on your device, often due to running a virtual machine or utilizing Windows Subsystem for Linux (WSL).
How to Address High Memory and CPU Usage from Vmmem
If Vmmem is consuming too many resources, identifying the virtual machine or application responsible is key. Here are several steps to resolve the issue:
- Terminate Resource-Heavy Processes
- Open Task Manager by searching for it in the Windows search bar.
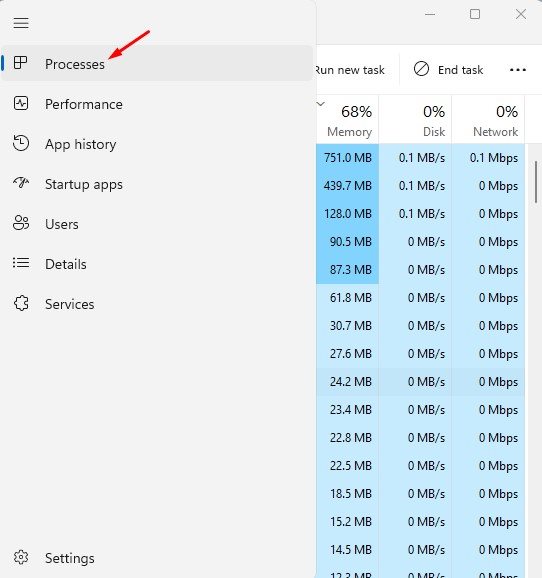
- In the Task Manager, navigate to the “Processes” tab.
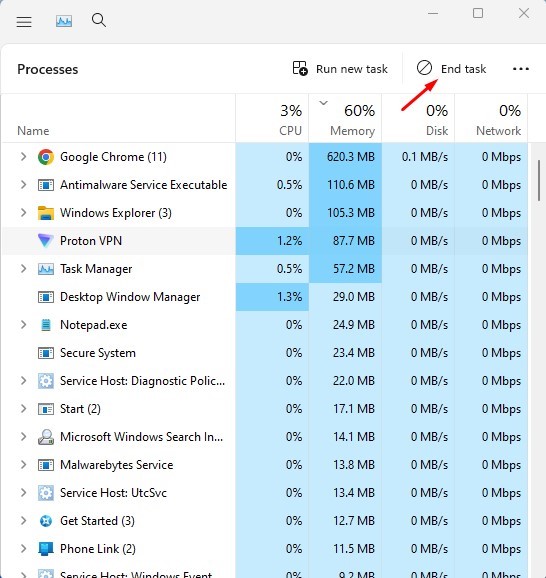
- Identify processes using excessive memory or CPU, right-click on them, and select “End task.”
- Restart WSL
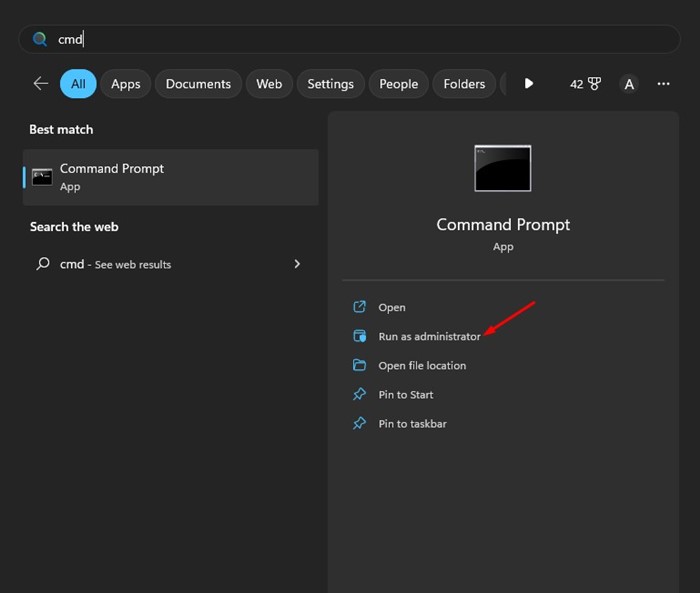
- Open Command Prompt as an administrator by searching for “CMD” and selecting “Run as administrator.”
- Type the command
wsl --shutdownand press Enter. This will stop WSL, which will restart when you reboot your computer.
- Modify the Wslconfig File
- Open File Explorer and go to
C:\Users\your-username\.wslconfig. - Open the file in Notepad and add the following lines:csharpCopy code
[wsl2] guiApplications=false - Save the file and restart your PC.
- Open File Explorer and go to
- Disable Hyper-V
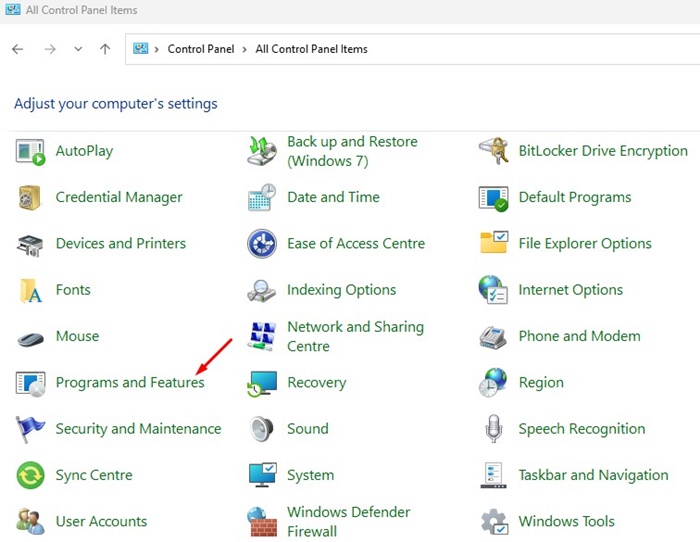
- Access the Control Panel and navigate to “Programs and Features.”
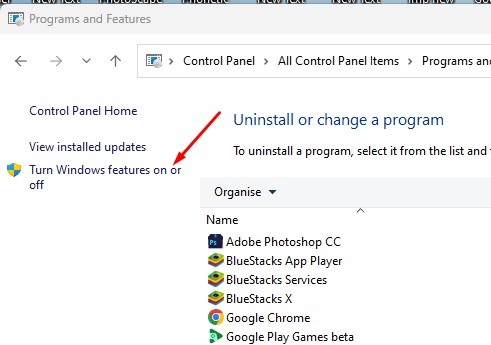
- Click “Turn Windows features on or off” and uncheck Hyper-V. Click OK to apply changes.
- Uninstall Virtual Machines
- If you recently installed a virtual machine, it might be causing high resource usage. Uninstall it by going to Control Panel, finding the virtual machine, right-clicking it, and selecting “Uninstall.”
- Disable Virtualization in BIOS
- If you’ve enabled virtualization, it might contribute to the issue. Access your BIOS or UEFI settings to disable it. Refer to your motherboard’s manual or online resources for guidance on this process.
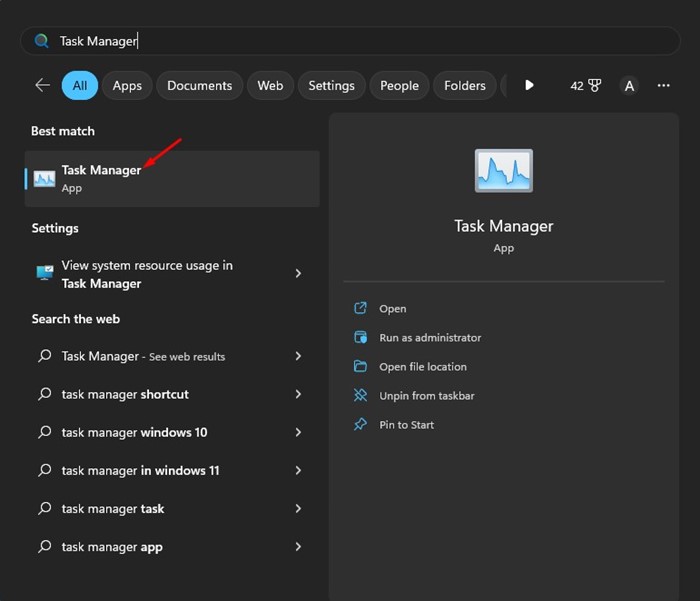
2. When the Task Manager opens, click on the Processes tab.
3. Now monitor the processes and apps using the most memory and CPU resources.
4. Right-click on them and select End task.
2. Restart the WSL
Running Linux binary executables through WSL (Windows Subsystem for Linux) might be causing high resource usage from the Vmmem process. You can resolve this issue by restarting WSL.
- Begin by searching for “CMD” in the Windows search bar. Then, right-click on Command Prompt and choose “Run as administrator.”
2. Type the given command on the command prompt and press Enter.
wsl --shutdown
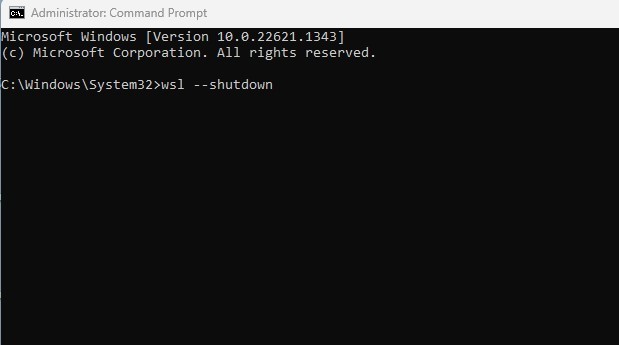
This will shut down the WSL. However, it will start again when you restart the computer.
3. Modify the Wslconfig File
If the command prompt method doesn’t work or shows an error, you can try this alternative approach:
- Open File Explorer and go to the following location:
C:\Users\your-username\.wslconfig - Double-click the
.wslconfigfile to open it in Notepad. - Once the file is open, add these lines:csharpCopy code
[wsl2] guiApplications=false
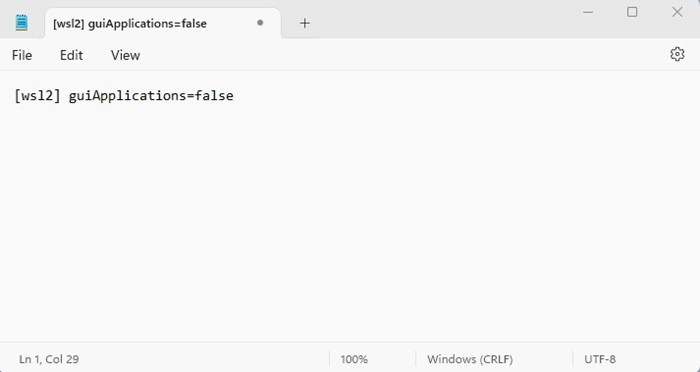
4. Next, click on the File button and select Save.
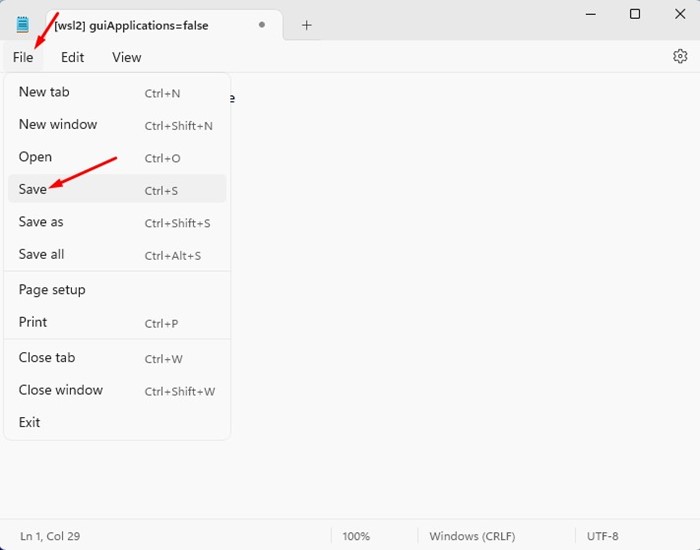
After making the changes, be sure to restart your Windows PC. This should resolve the high memory and CPU usage caused by Vmmem on your computer.
4. Disable Hyper-V on Windows 11
You also need to disable Hyper-V, a Microsoft product that allows creating and running multiple virtual machines on a single device. Here’s how to do so.
1. Open the Control Panel from the Windows Search.
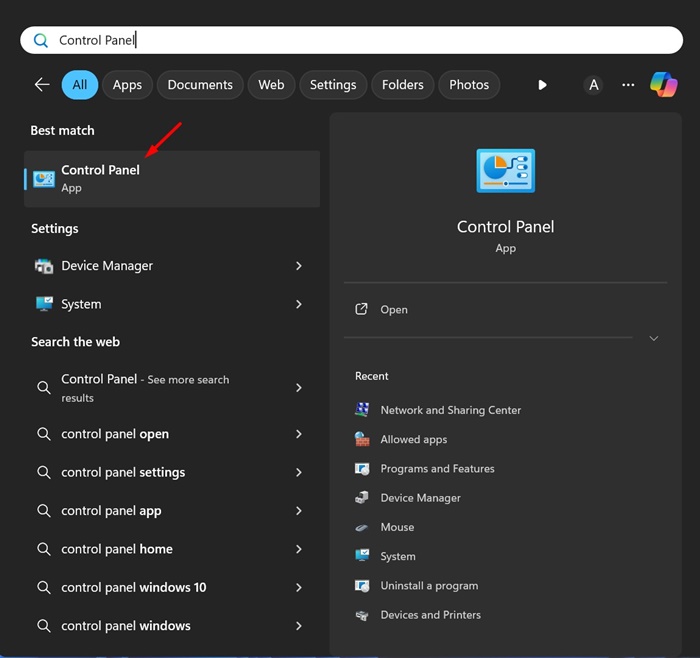
2. On the All Control Panel Items, select Programs and Features.
3. Click on Turn Windows Features on or off on the left side.
5. Uninstall your Virtual Machine
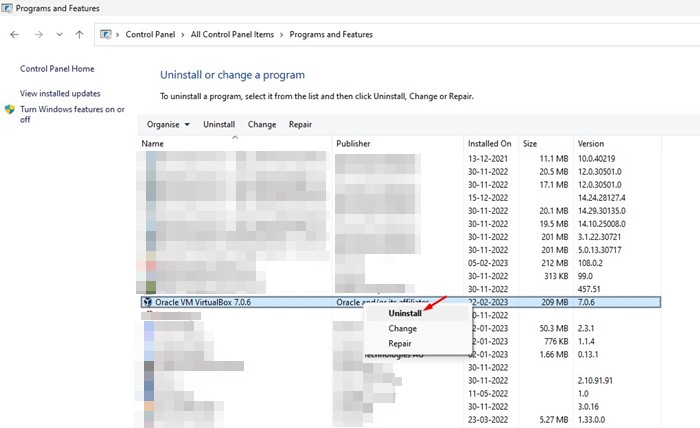
The Vmmem process usually shows up when Windows detects a virtual machine, whether it’s VirtualBox or Hyper-V Manager.
If you’ve recently installed a virtual machine or a sandbox environment to test software or an operating system, it’s best to uninstall it. Just disabling it won’t be enough; you need to remove it completely.
To uninstall the virtual machine, open the Control Panel, find the virtual machine you installed, right-click on it, and choose “Uninstall.” Then, follow the on-screen instructions to finish the process.
6. Disable Virtualization on your computer
If virtualization is not enabled on your PC, you won’t be able to run any virtual machine on your device. Virtualization is probably enabled if you have run any virtual machine.
The goal here is to turn off your computer’s virtualization feature. Disabling virtualization is difficult; you must boot into BIOS or UEFI and turn off the feature.
If you don’t know how to open BIOS or UEFI, you can try searching terms like ‘Disable Virtualization in or SVM in ASUS BIOS/UEFI’, ‘Disable virtualization in Gigabyte Motherboard’, etc.
Besides these methods, a few things can help you deal with the Vmmem Process High CPU usage problem. You can update your operating system, run an antivirus scan, or roll back your Windows Version using the System Restore functionality.
Addressing High CPU Usage from Vmmem with Docker
Many users experience high CPU usage from Vmmem when using Docker with Windows Subsystem for Linux 2 (WSL2). Reports indicate that memory usage can spike to 99%, with CPU consumption sometimes reaching 100%.
To resolve high CPU usage for the Vmmem process on Windows, the simplest solution is to restart your computer. Additionally, you can try limiting the memory allocated to WSL.
Reinstalling WSL has been effective for some users, but keep in mind that this process can be complicated and doesn’t guarantee a fix.
For more information, check out our guide on fixing high CPU usage in Windows.
These are some effective ways to tackle Vmmem’s high CPU usage in Windows. If you need further assistance, feel free to ask in the comments. And if you found this article helpful, please share it with your friends!

1 Comment
Hi, this is a comment.
To get started with moderating, editing, and deleting comments, please visit the Comments screen in the dashboard.
Commenter avatars come from Gravatar.